Ever seen 3D printed models that seem to defy gravity? Adding a support structure isn’t the only way. So if you want to avoid the painful removal and marks and even damage the object, you can use overhangs and bridges instead. Here are two ways you can add unsupported parts to your model.
What is an overhang?
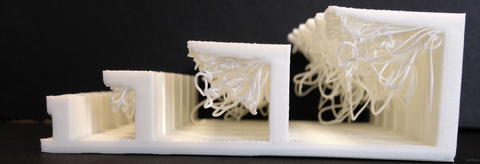
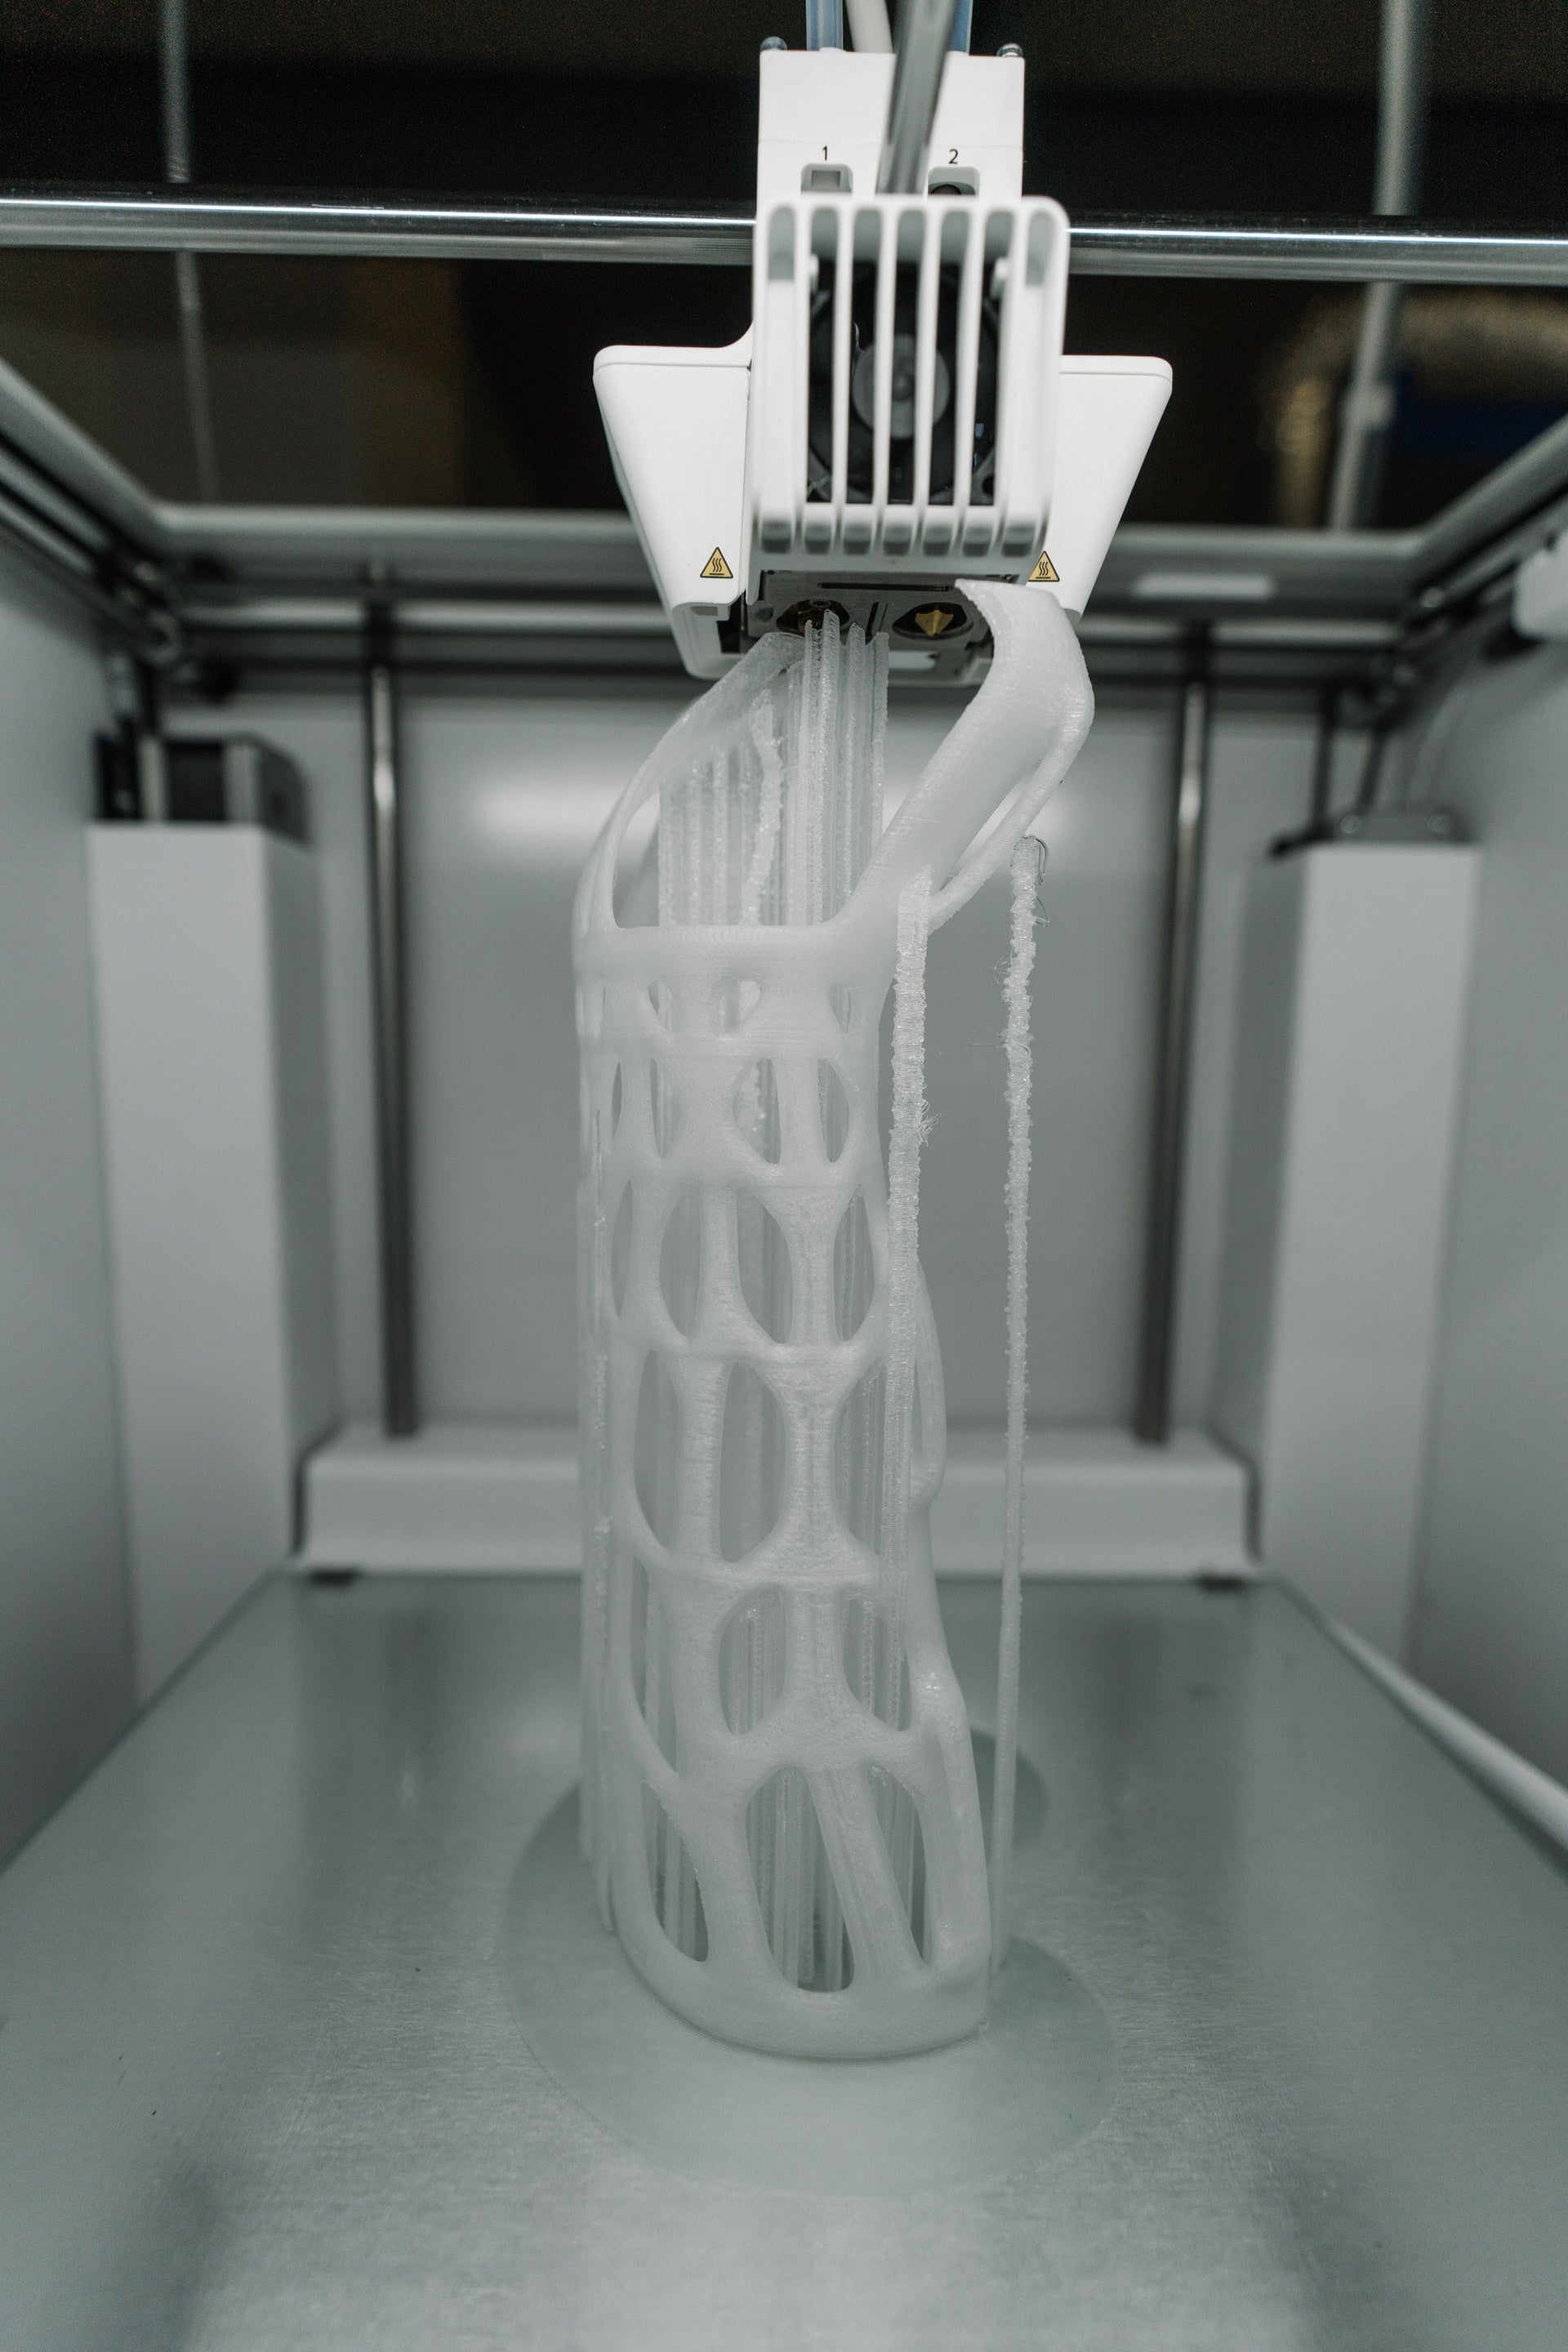
An overhang in 3D printing is part of an object that has nothing to support it and it could collapse if it hangs over the previous layer too far. A perfect example of this is the letter T. If you print it vertically, the vertical line would be printed just fine, but the horizontal line would cave in especially as it goes toward the ends farthest from the vertical line.
Fortunately, it is possible to print a self-supporting overhang successfully.
1. The 45-degree rule
If you want to keep your overhangs stable, they should never exceed 45 degrees. In 3D modelling, it is a general rule to never design models with angles beyond 45 degrees. However, this rule can be limiting as some designs just require more than a 45-degree angle to be functional or beautiful. If you must go beyond 45 degrees, the next step is how you can do it.
2. Print overhangs like a staircase
Instead of printing an overhang straight across horizontally, you can add curvature to it so that it’ll have something to support it. For each layer, you should add an offset of 50% so that it can be fully supported by the layer below it. As you grow closer to the horizontal, you should increase the offset as it gets structurally unstable. For example, for a 75° angle, each successive layer should be offset by 80%.
3. Add a chamfer
A chamfer is a symmetrical, sloping surface at the edge or corner that allows designs to go beyond 45°. However, a chamfer may not always work for your design. It is just a way to soften an extreme angle.
4. Calibrate your printer well
Proper 3D printer calibration is the secret to the success of any 3D printing project, but particularly for over 45° overhangs. Make sure that the bed is levelled, the nozzle is clean, and the build surface is clean. Overhangs require precision printing so your printer has to be in tip-top shape.
5. Increase layer cooling
It is important that the cooling of layers is fast to solidify the overhangs quickly. The longer that the part is soft after extrusion, the more likely that the hanging part will collapse. You can also lower the printing temperature to prevent the filament from coming out too melted.
6. Lower layer thickness
The less mass there is per layer, the faster that it cools. You can also change the shell settings/perimeters so that you start printing from the inside out.
7. Reduce print speed
Another step that can speed up cooling further is lowering the print speed so that the layer is cooled first before another layer is extruded upon it.
What are bridges?

Bridges are similar to overhangs except that they are typically on a 90-degree angle without anything to support them. Bridges are only supported by the tension at both ends of the bridge. The longer a bridge is, the more likely it is to collapse. It is advisable to print bridges that are 5mm at most at length. You can create stable bridges by doing the same steps above. For more bridge-specific tips, you can check out the list below.
1. Change the orientation of the print
You don’t have to print the model vertically, especially bridges. If it is possible with your design, you can print it lying down or on its back.
2. Add an arch to the bridge
A bridge that is at a flat 90° angle is bound to collapse especially if it is long. You can add a slight arch to lessen the severity of the angle and make it more structurally sound.
The #1 secret to a successful overhang or bridge is…
All these steps will all be naught if you’re not using high-quality filaments, such as X3D Pro filaments. Overhangs and bridges require high precision so it is important to use filaments that are easy to print with and have minimal printing issues. For inquiries, you can contact us by phone or email.