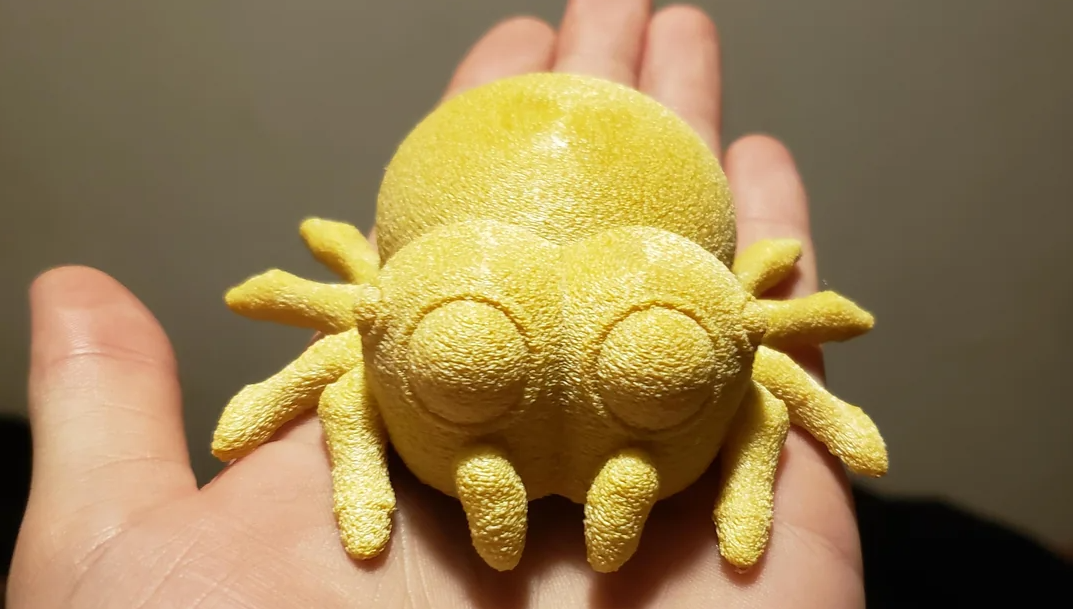
In 3D printing, a textured surface is something that most people try to avoid. However, a seasoned 3D printing enthusiast would know that intended texture is sometimes needed, whether it’s to hide imperfections, replicate fur on a 3D animal model, or make a functional object easier to grip.

Credit to JoshsPizzaria from Reddit
How does one achieve a controlled texture? It’s through slicers. UltiMaker’s Cura is one of the most popular open-source slicing software programs. One of its “Experimental” features is Fuzzy Skin, which can give your 3D prints a unique, textured finish.
Learn how Fuzzy Skin works on our latest blog.How does Fuzzy Skin work?

Credits to IAmAPhysicsGuy from Reddit
Fuzzy Skin works by adding a layer of "fuzz" to the outer walls of your 3D print. The slicer instructs your 3D printer to move a “wobbly nozzle” back and forth during 3D printing. Take note that the feature is only applicable to the sides of the model as it would affect the structural integrity of the object if the top and bottom are printed with a wobbly printer. The result is a slightly rough, textured surface.
Perhaps you’re thinking, “Won’t it ruin my 3D print by having the nozzle wobble?” No, the 3D printer’s wobbling is completely controlled. The nozzle only wobbles at certain random points in the print.
Despite all the additional motion brought on by the Fuzzy Skin feature, it doesn’t add to the print time. However, expect your 3D printer (particularly the motors) to make more noise but it still depends on the stepper motor drivers you use.
How do I use Fuzzy Skin?

Credit to Josephus-Miller-Lite from Reddit
This fuzz is created by extruding filament in a random pattern over the surface of the print.
Here's how to use the Fuzzy Skin feature in Cura:- Install the latest version of Cura (any version after V2.1)
- Set your visible settings to “All.” Fuzzy Skin can be found under the “Experimental” section or by searching “fuzzy.”
Fuzzy Skin has several settings:
Fuzzy Skin: Click on this to enable the Fuzzy Skin feature on your 3D print. Once you enable this, you should see the other fuzzy skin settings below.Fuzzy Skin Outside Only: This parameter allows the fuzzy skin texture to be generated on the outermost walls of your print.
Fuzzy Skin Thickness: This setting determines the severity and depth of the nozzle wobbling to achieve a fuzzy skin texture. This measures the distance in millimetres. Increasing the default value will add to the unevenness and fuzziness of the surface.Fuzzy Skin Density: You can set the density of the nozzle wobbling through this setting. Increasing the default value (measured in 1/mm) will also add to the nozzle jitters will make in one area. This results in a rougher and more detailed surface.
Fuzzy Skin Point Distance: This is heavily influenced by the Fuzzy Skin Density value above. It controls the average distance between the wobbling points.Add interesting texture to your 3D prints with Fuzzy Skin!
If you're looking for a unique way to add texture and interest to your 3D prints, Fuzzy Skin is worth trying out. It's a fun and easy way to experiment with different finishes and make your prints stand out. For inquiries on this feature and UltiMaker 3D printers, you can email us at x3d@x3d.com.au.