
Post-processing is crucial to unlocking the fine details of your resin prints. With resin printing, there’s no such thing as print and go. Due to its process of developing the print under the vat of resin, you still have to clean up and cure your prints after printing. Here are post-processing tips for high-precision and accurate resin 3D prints.
1. Take the necessary precautions before handling resin
The resins used in DLP 3D printing are made of chemicals that can be toxic or irritating to the skin. Therefore, it is necessary to wear protective gear like nitrile gloves, safety glasses and be in a clean and well-ventilated workspace when resin printing.
As expected with resin, things can get messy, so make sure you have wipes or wash towels around for spillages. Clean every spill immediately after it happens as resin hardens and can leave marks and stains.
If your bare skin gets into contact with resin, wash it immediately with soap and water to prevent irritations.
2. Rinse your resin 3D print
Resin prints are covered in excess resin upon printing. What you should do is rinse off the uncured resin to “clean” it up and get it ready for the next post-processing steps. Here’s are easy and fool-proof ways you can rinse off your resin 3D prints.
-
Resin Cleaning Wash or Methylated Spirits
A resin cleaning wash is an all-around cleaner for uncured resin from printed parts, vats, build plates, instruments, and surfaces. It does not only clean up your prints, but also spillages and residue from resins. The best thing about using a wash is that it doesn’t leave white marks, surface cracks, or cloudiness on your prints unlike isopropyl alcohol (IPA).
You can also use methylated spirits, which is a cheap alternative that is readily available in hardware stores.
How to use: First, pre-wash your 3D print by placing it in a container of resin cleaning wash and shaking it a bit. Take it off the container and carefully brush off the excess resin. Dunk it in the container if you notice it drying up and just keep brushing to remove the resin remnants.
Second, with the use of an ultrasonic bath, pour some of the wash or methylated spirits into the bath and let your print soak there for a couple of minutes.
Lastly, to ensure that you’ve completely removed the layer of uncured resin from your print, use compressed air or lint-free cloth carefully.
Tip: If you don’t have an ultrasonic bath, you can just do the pre-wash method instead. Just make sure to swish the print around in the cleaning solution twice to strip away the residue resin.
-
Run it under water

Some resins are easier to clean like our X3D Pro Water Washable Resins. You can just rinse off the uncured resins with clean water. Just remember not to dispose of the water down the drain afterward.
3. Take off the supports
Now that they have done their job during printing, there is no place for them anymore during post-processing. The easiest way to remove them without ruining your prints is to do it before the curing stage. Curing makes the print harder which will then make it more difficult for you to remove the support. You’ve got two ways to go about support removal for resin prints:
a. Snapping it off
If you aren’t worried about fine details, you can just break off the support from the print using your hands. Be careful of stray plastic bits flying off.
b. Cutting it off with flush cutters
Using flush cutters is a safe way to remove support without damaging the details of your prints. Carefully cut off the supports, going as close as possible without damaging the surface. While this may leave small lumps on your print’s surface, you can easily sandpaper them off.
4. Cure your resin prints
UV curing is a crucial step to finalise your 3D prints and bring out their fine features. It involves exposing your prints to UV light to solidify your print and make it functional. This can be done in several ways.
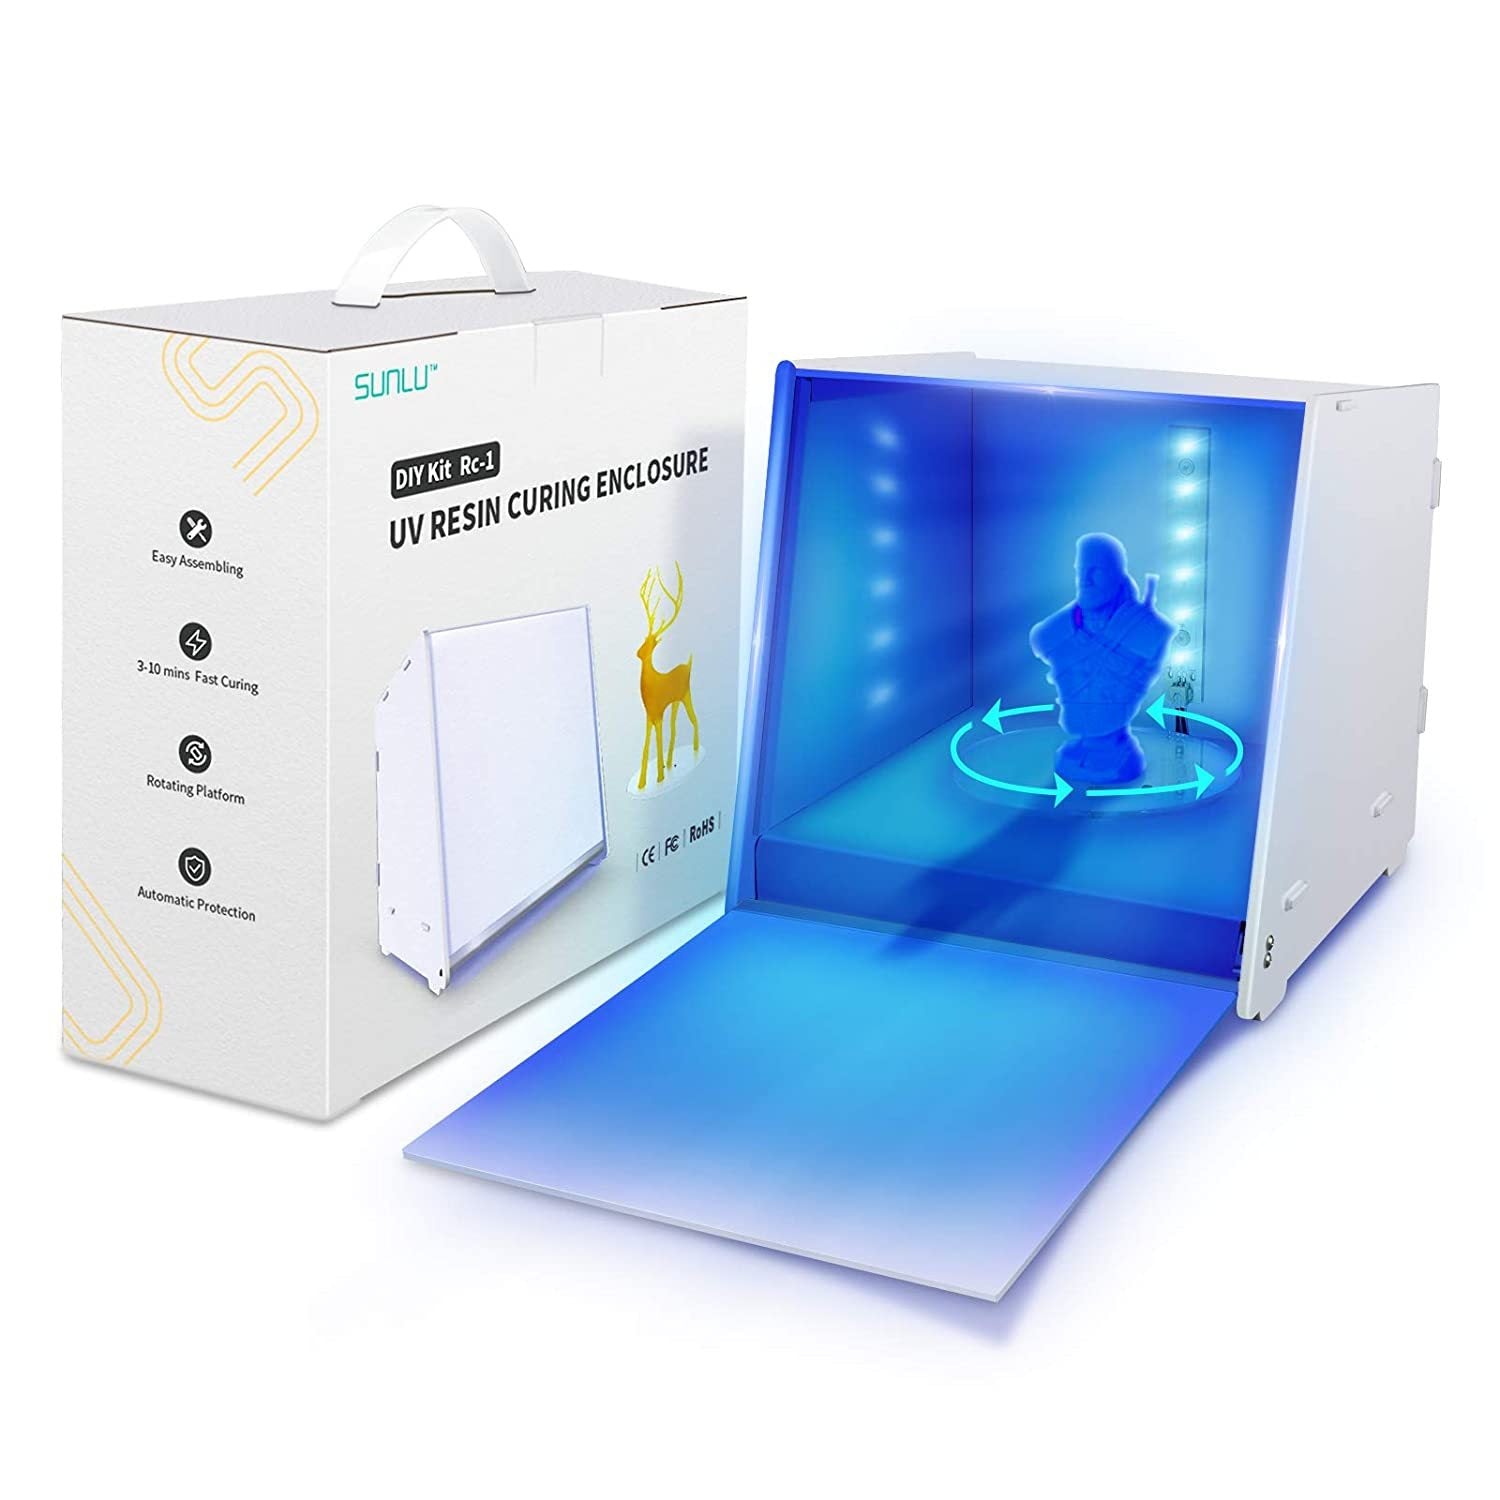
a. Sunlu UV Resin Curing Light Box

Sunlu UV Resin Curing Light Box is an affordable and easy-to-use UV curing station that will be launched next week. It is compatible with most resins and is powerful enough to cure a printed model within minutes. This UV resin curing light box also has a quick-acting timer button that controls curing time from 0s to 6mins, preventing your print from yellowing from being overexposed.
It is equipped with 6 high-powered 405nm UV LED lights and a 360° Rotating Turntable with 10 revolutions per minute will ensure that your prints will be evenly cured. Meanwhile, its sturdy enclosure and special optical filter material will ensure that the UV rays won’t leak out of the box.
b. Light Curing Lamp - US Plug
If you want a compact and handheld device to cure your prints, this light curing lamp emits 405nm through its 6 lights. It is encased in an aluminum shell with dimensions of 75x110x85mm, making it compact and portable. It is a no-frills manual curing lamp that you can use to cure your 3D-printed object from all sides.
c. Sun
If you want to be environmentally friendly, you might want to just put your print under the glorious UV rays of the sun. The caveat to this is that it will take a lot longer, so patience is key.
Get the strength and ultra-fine details to shine through your resin 3D prints with these post-processing tips!
Post-processing is the secret to your 3D print’s success. After post-processing, you could prime and paint your print or just enjoy it in its natural glory. Got a question? You can contact us by phone or email.